Reading analog sensor values using pyMCU
One of pyMCU handy features is the ability to read analog
values - voltage in the current altered by a sensor or potentiometer - electronics that alters its resistance depending on conditions. There are photodiodes, phototransistors, photoresistors (light sensors, thermocouples and other temperature or magnetic field sensors (Hall sensor) that work in such analog
way. In this article I'll show you how to read values from those sensors using pyMCU and some Python code.

Controlling electronics with Python - a quick start with pyMCU board
pyMCU is an electronic board that can handle electronic components like various sensors (temperature, light, pressure, magnetic field, distance etc.) or for example small alphanumeric displays. All of that is done by code you can write in Python. The board is equipped with a PIC 16F1939 microcontroller offering 13 Digital IO Pins, 6 Analog IO Pins, 5 10-bit PWM Pins, and a 16 Pin Parallel LCD Interface. The board can be connected to nearly any computer via provided mini USB port. There are drivers for Linux, Windows and OSX. You can find more information on project website.
Compared to for example Raspberry Pi and other mini-computers this board isn't a computer and has no CPU or RAM like those mini computers. It's controlled from the computer to which it's connected. It can be a PC, laptop or also Raspberry and some other mini-computers. It provides similar features as Raspberry GPIO pins (or Arduino etc.). By default it uses 5V so it can be used as an addition to 3.3V Raspberry or to work with 5V Arduino components. A handy tool for you self-made electronics project.
pyMCU can be ordered from the shop for around 20 EUR or $25. Is cheaper than Raspberry as it's a simpler board - no CPU, RAM or other peripherals.

A note on Raspberry Pi camera and astrophotography
Raspberry Pi camera have been released and some already tried to use it for astrophotography. The camera uses OmniVision OV5647 CMOS sensor. Similar sensors are in Microsoft LifeCam Cinema and Studio webcams. Those are used for some entry-level planetary imaging too. However the Raspberry camera is slightly different from the webcams.
The sensor used in the camera module has very small pixels - 1.4 micrometer (5.6 in DMK/DFK/DBK21 or Philipcs SPC900NC). That will result in high resolution at fast focal ratios. While a 5,6 micrometer pixel based camera would use around f/20 the Raspberry camera requires only f/5. If you have a fast Newtonian you don't need a Barlow. If you have an f/10-12 Maksutov or SCT - the image will be over-scaled (when camera has no lens). A focal reducer would be required. Second option would be binning (the sensor supports bin2), but I don't know if and how it's supported in the software (and is it real color bin2 or pixel bin2 which looses color). Third would be eyepiece projection imaging where long focal length eyepiece would reduce the resolution (the camera module has a lens that rather isn't removable).
As for imaging - it's a color sensor with an IR/UV built in. No extra filters needed. It also has a lens, which makes some problems. Ideal configuration would be without that lens - for prime focus imaging. When the lens is used (like for the published results) then you get a projection imaging and it's harder to predict the resolution you would get (but if you have an SCT or Mak it's one of ways to reduce the resolution on the sensor).
For Deep Space imaging (on long exposures) this sensor would be even harder to use. First there are the small pixels (only bright lenses or some very low resolution eyepiece projection would be good), next is the sensor performance. Such CMOS sensors are noisy so they would have to be cooled. Also doing flat and dark frames would be a must. Bias frames maybe too. In general very hard/annoying. Typical Canon would be probably a much better solution for this (and Raspberry camera used as a guide camera)...
You always need guiding. There is a chance that open-PHD could run on ARM and guide with the Raspberry camera via RS232 connection with the mount. Canon does the imaging, Raspberry does the guiding and no bigger computer would be needed.
Compared to dedicated planetary cameras (good machine vision cameras) the Raspberry + camera board is cheaper, but also less friendly to use. You can't use FireCapture or SharpCap for AVI capture. You will also need good storage for the captured clips or frames - either HDD on USB or bigger USB stick. Depending in which format/codec you save the movie clip the stacking applications (Registax or Castrator/Autostakkert on Windows) may have problems reading it. A set of BMP (or eventually TIFF) files would be a safe choice in this case (or an AVI in RGB24 or similar supported format/codec).
Note that some camera vendors like Point Grey provide Linux ARM support (don't know if ARMv6 is supported - needed for Raspberry, or only ARMv7 for newer processors). So in theory some USB or Ethernet (GigE) machine vision cameras could work on Raspberry and similar ARM-based mini computers.
Long range Bluetooth communication with SENA Parani UD100 adapter
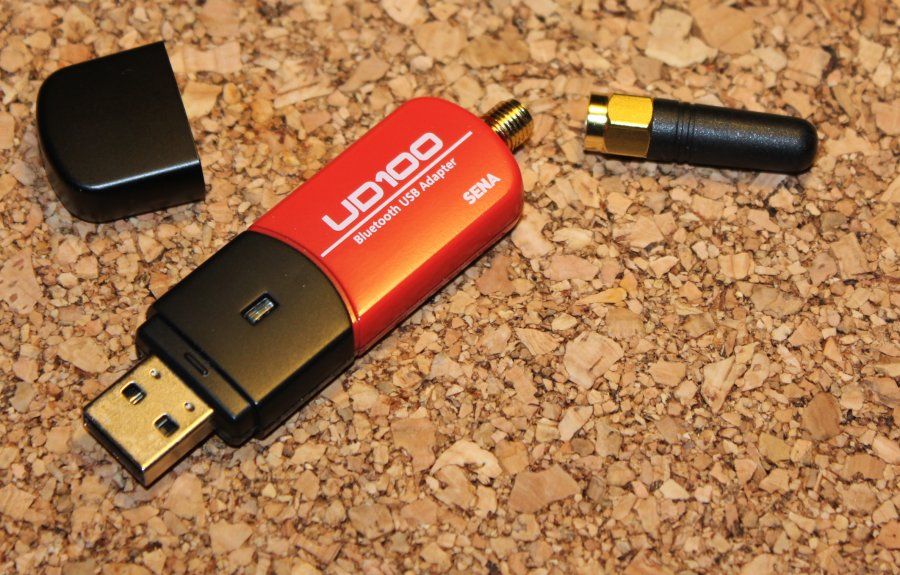
Bluetooth is today in a lot of devices and we don't even find that to be a special feature. Average USB Bluetooth adapters have a working distance of around 10 meters. Some low power devices may work on on even shorter distances. On the consumer market there is no need for very long distance Bluetooth communication (practical and security reasons). However there is an industry-type USB Bluetooth adapter that is easy to use and has much wider working distance - SENA Parani UD100.
Point Grey publishes QE and characteristics for sensors used in Blackfly and Grasshopper 3 cameras
Point Grey released two PDF documents for Blackfly and Grasshopper 3 cameras. You will find quantum efficiency charts (sensitivity) as well as noise and other handy informations for each sensor available in those cameras.
Mentioned camera lines use latest Sony CCDs that reach QE of around 70%. They in general are of good performance, although those bigger ones won't be cheap. One of Blackfly cameras uses E2V CMOS sensor - EV76C560. It provides lower sensitivity, but it gives quite big diagonal and speed at a low price. This sensor is available also in IDS Imaging cameras and was used/tested in astrophotography earlier.
You can also check my cameras list for sensor and other informations.
Using USB3 to HDMI adapter based on SMSC chipset under Linux
There is a lot of USB universal docking stations or display output (HDMI, DVI, D-SUB) adapters. Most of them is based on DisplayLink (not Display Port) or SMSC chipsets. Those adapters or docking stations are handy for Ultrabooks or other laptops as they provide a lot of connectors - USB, Ethernet or multi-display capabilities.
When using Linux you are limited to older DisplayLink adapters (USB2 based). The USB3 chipsets are not supported (from what I know). SMSC USB3 chipsets have a Kernel as well as X.org drivers, but it's not that straightforward to use them under Linux. In this short article I'll look at SMSC based adapter and software provided by the manufacturer

Philips DLP2207 power supply for USB devices
Philips DLP2207 is a power supply, a mobile device USB charger capable of charging up to two devices connected via an USB cable. It offers 5V 2.1A, which is enough even for most power demanding devices, that can be charged via USB. You can find specification on the Philips website.
Powered USB2 HUB LogiLink UA0128
LogiLink UA0128 is an active USB2 HUB, and as such it comes with a power adapter (5V 2A) that can power USB devices connected to it. It provides for USB2 ports with power switches allowing turning them on and off.
On logilink webpage you can find some detailed informations. The documentation that came with the HUB mentions even that it's possible to connect around 128 devices (probably through some insane daisy-chain of HUBs). Similar looking HUBs are available under other brands (as it's quite likely typical branding of China mass made item)...
Quick test of Asus USB-N10 WiFi adapter under Linux
Asus USB-N10 known also as ASUS EZ N is a WiFi b/g/n USB adapter. It's sized between common mini adapters and long classical ones. Slightly longer housing was used to put bigger antenna than that found in mini adapters. How this Realtek based WiFi adapter works under Linux? Lets find out.

A quick look at Cubieboard micro computer with Allwinner A10 ARM CPU
Cubieboard is one of many mini computers with ARM processors. This one is equipped with Allwinner A10 processor with Mali400 GPU - a very common chip among entry-level tablets and smart-phones. We also get 1 GB or RAM (480 MHz DDR3), 100 mbit Ethernet, two USB2 ports and one SATA port. There is also 4 GB of NAND Flash holding Android system (4.0) and a slot for micro SD cards to run other operating system like Linaro Ubuntu.
Priced at $49 it's one of cheapest boards available. It's bit more than Raspberry Pi, and less than stronger dual and quad core boards. If you want to buy it the quickest way would be through ebay from China. It should be better than Raspberry in term of performance, but lower popularity and limited amount of addons makes it less usable. Is this board worth the effort?


